


You want to know what belongs in the ultimate survival kit. Emergencies can strike without warning, so having a well-prepared kit boosts your safety and confidence. Studies show that comprehensive emergency planning tools, backed by strong reliability and content validity, make a real difference when disaster hits. Many people overlook key survival needs, but you can avoid that. This guide gives you practical tips to keep your survival kit ready for anything. Whether you’re new to survival or a seasoned pro, you’ll find this guide helpful for building the right kit.
Key Takeaways
- Always include clean water and reliable purification tools to stay safe and hydrated in emergencies.
- Pack non-perishable, calorie-rich food and rotate supplies to keep your energy strong and your kit fresh.
- Bring shelter, warmth, and fire-starting tools to protect yourself from the elements and stay comfortable.
- Organize your kit by grouping items by function and keep high-priority gear easy to reach for quick access.
- Check and update your survival kit regularly, replacing expired items and personalizing it to fit your needs.
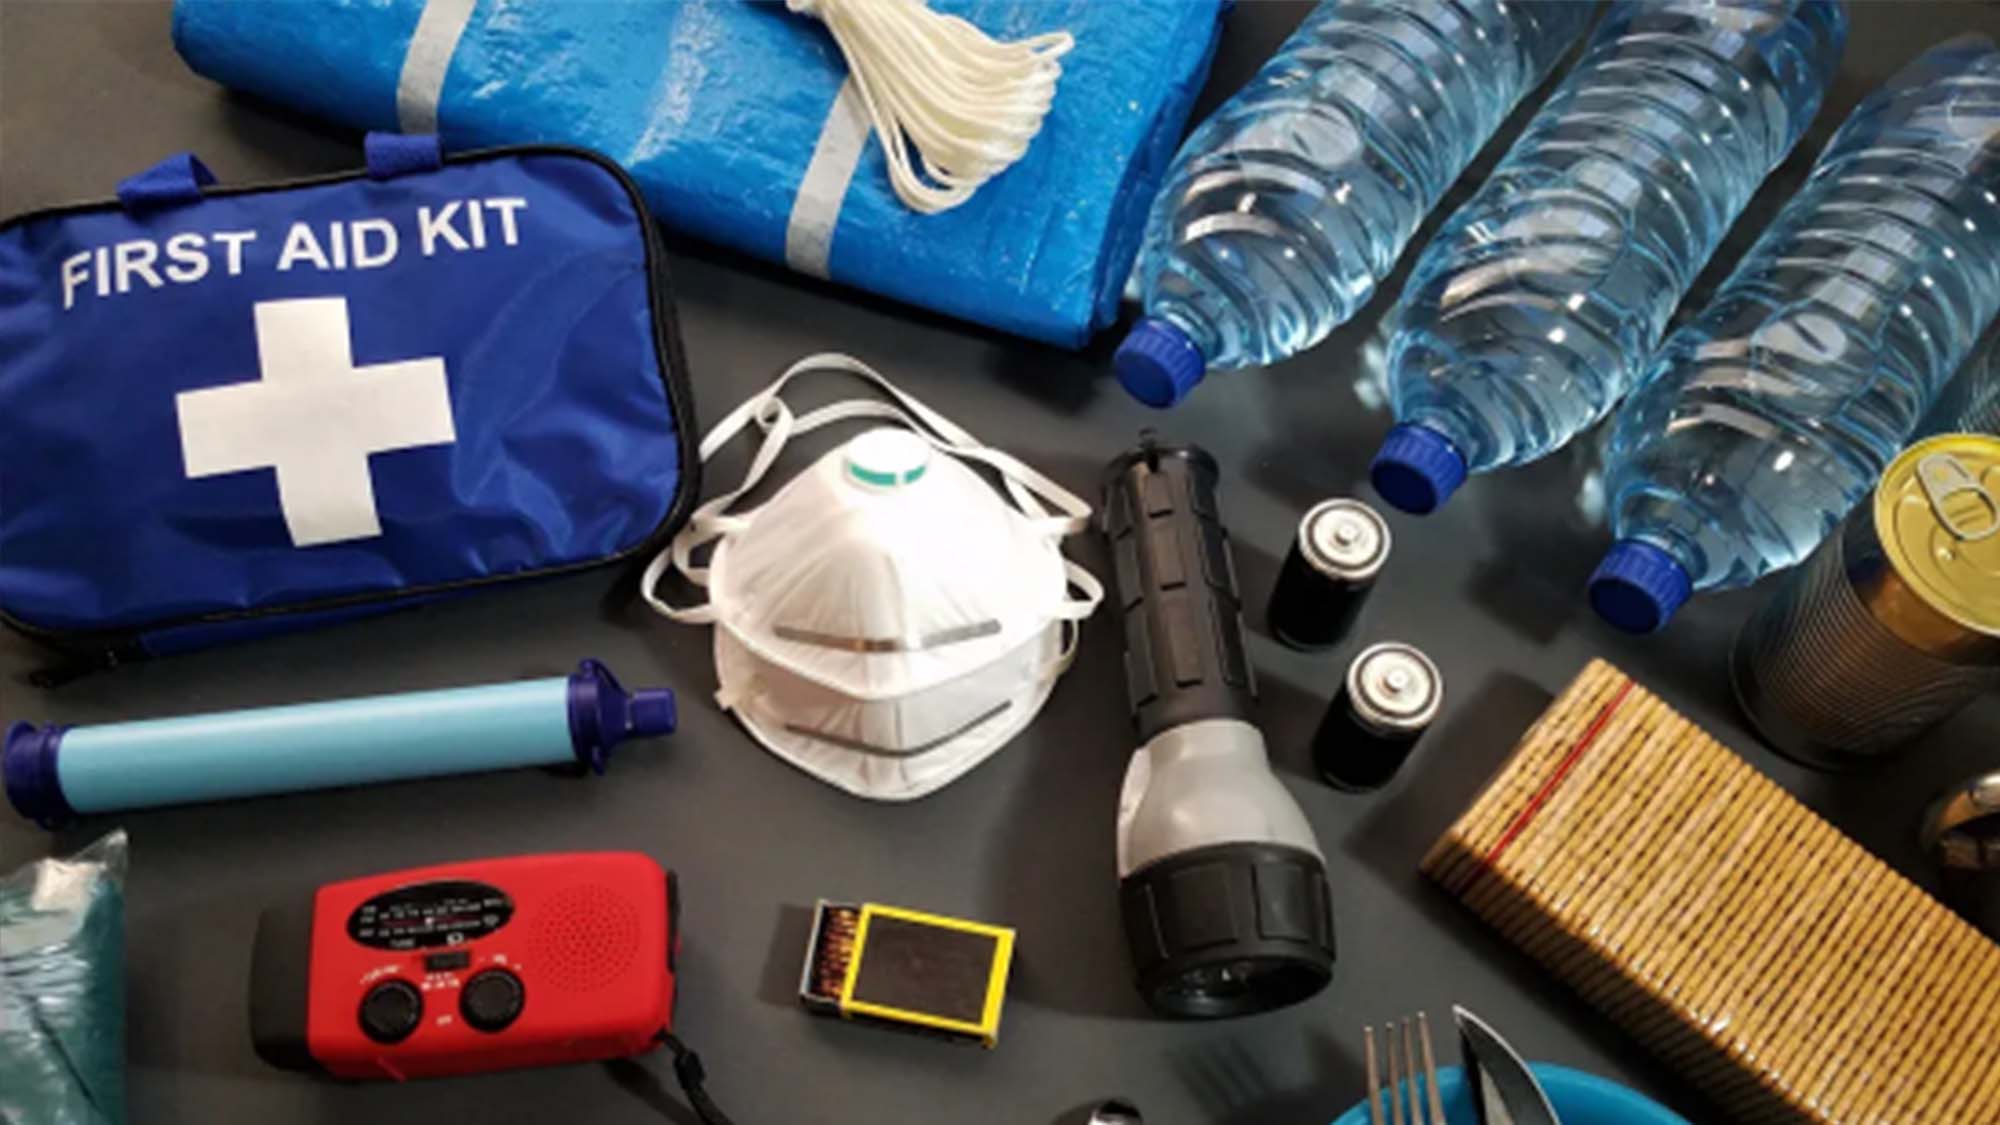
Ultimate Survival Kit Essentials

Water and Filtration
Water is your top priority in any survival situation. You need at least one gallon of water per person per day for drinking and sanitation. Always pack a sturdy water bottle and a backup container. Water purification is essential, so include a portable water filter and water purification tablets. These tools help you remove bacteria, viruses, and protozoa from natural sources. Ceramic filters and chlorine treatments are proven to reduce disease risk. Check out this table for how different methods work:
|
Treatment Method |
Pathogen Type |
Optimal Log Reduction (Ideal Conditions) |
Expected Log Reduction (Field Conditions) |
Diarrheal Disease Reduction (%) |
|
Ceramic Filters |
Bacteria |
6 (99.9999%) |
2 |
46–63 |
|
|
Viruses |
4 |
0.5 |
N/A |
|
|
Protozoa |
6 |
4 |
N/A |
|
Free Chlorine |
Bacteria |
6 |
3 |
25–48 |
|
|
Viruses |
6 |
3 |
N/A |
|
|
Protozoa |
5 |
3 |
N/A |
|
Coagulation/Chlorination |
Bacteria |
9 |
7 |
18–42 |
|
|
Viruses |
6 |
2–4.5 |
N/A |
|
|
Protozoa |
5 |
3 |
N/A |
|
Biosand Filtration |
Bacteria |
3 |
1 |
21–64 |
|
|
Viruses |
3 |
0.5 |
N/A |
|
|
Protozoa |
4 |
2 |
N/A |
|
Solar UV Disinfection (SODIS) |
Bacteria |
5.5 |
3 |
26–37 |
|
|
Viruses |
4 |
2 |
N/A |
|
|
Protozoa |
3 |
1 |
N/A |
You can see that combining filtration and chemical disinfection gives you the best protection. Always store your water in tightly sealed containers to keep it safe.
Food and Nutrition
Food keeps your energy up and your mind sharp. For your ultimate survival kit, pack at least a three-day supply of non-perishable food. Choose calorie-rich, shelf-stable options like protein bars, canned meats, dried fruits, and freeze-dried meals. These foods last long and are easy to prepare. Don’t forget a manual can opener and utensils. If you have special dietary needs or infants, include formula or gluten-free options. A multivitamin helps cover any nutrition gaps. Here’s a quick look at how different food kits compare:

Store your food in a cool, dry place. Rotate your supplies to keep them fresh and safe.
Shelter and Warmth
Shelter protects you from the elements and keeps you comfortable. Your kit should include a tarp, emergency blanket, and a compact tent or bivvy. These items help you build a quick shelter and stay warm. Practice shelter building before you need it. Use natural features like trees or rocks for extra support. Insulate yourself from the ground with leaves or a sleeping pad. Layer clothing for warmth and always keep an extra set of dry clothes in your kit. A blanket or emergency blanket can save your life in cold weather.
▶Tip: Smaller shelters retain heat better and are easier to build quickly. Always ventilate your shelter if you use a fire inside.
First Aid
A well-stocked first aid kit is a must for any survival kit. Include non-latex gloves, sterile gauze pads, bandages, antibiotic ointment, antiseptic wipes, and basic pain relievers like acetaminophen or ibuprofen. Add an emergency blanket, tweezers, adhesive tape, and a thermometer. Personal medications and copies of prescriptions are vital. Here’s a quick checklist:
- Non-latex gloves
- Sterile gauze pads
- Bandages (various sizes)
- Antibiotic ointment
- Antiseptic wipes
- Pain relievers
- Emergency blanket
- Tweezers
- Adhesive tape
- Personal medications
Knowing how to use these items is just as important as having them. Take a first aid course if you can.
Fire-Starting Tools
Fire keeps you warm, cooks your food, and signals for help. Pack at least three fire starting tools: a butane lighter, waterproof matches, and a ferrocerium rod. Each tool has strengths. Lighters are quick and easy. Matches work well if kept dry. Ferro rods last a long time and work even when wet. Always include tinder, like cotton balls or commercial fire starter, to help your fire catch. Practice fire starting in different weather so you’re ready when it counts.
- Butane lighter
- Waterproof matches
- Ferrocerium rod
- Tinder (cotton balls, fire starter)
Redundancy is key. If one tool fails, you have backups.
Light and Power
Light helps you see and stay safe at night. A reliable flashlight with extra batteries is essential. Headlamps free up your hands for tasks. Solar chargers and rechargeable batteries keep your devices powered. Choose batteries with high capacity and long shelf life. Solar panels offer renewable power for longer emergencies. Here’s a quick look at battery specs for survival kits:
|
Feature |
Ecoflow Delta Pro |
Ecoflow Delta 2 Max |
|
Battery Capacity |
3600 Wh |
2048 Wh |
|
Usable Capacity |
~3170 Wh (88% efficiency) |
~1863 Wh (91% efficiency) |
|
Power Output |
3600 Watts |
2400 Watts |
|
Peak Power |
7600 Watts |
4800 Watts |
Keep your phone charged for communication and emergencies.
Tools and Multi-Use Gear
Multi-use gear saves space and adds flexibility. A sturdy knife is your best friend in the wild. Use it for food prep, shelter building, and self-defense. Add a multi-tool with pliers, screwdrivers, and scissors. A hand saw helps you cut wood for shelter or fire. Paracord is lightweight but strong, perfect for tying down tarps or making repairs. Pack duct tape for quick fixes. Don’t forget a whistle for signaling and a compact field knife for detailed tasks.
- Knife (fixed blade or folding)
- Multi-tool
- Hand saw
- Paracord
- Duct tape
- Whistle
These tools make your survival kit more versatile and effective.
Hygiene and Sanitation
Staying clean keeps you healthy. Your kit should have soap, toothbrush, toothpaste, deodorant, and a washcloth. Add hand sanitizer, disinfectant wipes, and feminine hygiene products if needed. Nail clippers and a comb help you maintain personal hygiene. Good hygiene prevents infection and boosts morale during tough times.
▶Note: The American Red Cross recommends hygiene supplies as a core part of every survival kit.
Communication and Signaling
Communication can save your life. Pack an AM/FM or NOAA weather radio with extra batteries. A whistle is a simple but powerful signaling tool. Your phone, with a charger or power bank, lets you call for help. Emergency communication devices like two-way radios or satellite messengers add another layer of safety. Studies show that most emergency calls lead to successful rescues or on-site help. Keep a contact list and emergency plan in your kit.
Important Documents and Medications
Keep copies of IDs, medical records, insurance papers, and prescriptions in a waterproof bag. Store at least a week’s supply of medications. Include emergency cash for essentials. If you have pets, add their food, medications, and documents. These items help you recover faster after a disaster and make sure you get the care you need.
▶Remember: Customizing your ultimate survival kit for your family’s needs and local risks makes all the difference.
Survival Kit Organization
Packing and Grouping
When you organize your survival kit, you make it easier to find what you need fast. Start by grouping items by their function. Place food, water, shelter, fire-starting tools, and first aid supplies in separate sections. Many experts suggest using water-resistant bags to keep everything dry and easy to identify. You can also use small pouches or zip bags for your pocket survival kit items. This method helps you grab what you need without digging through your whole kit.
Here’s a quick look at proven organizational strategies:
|
Organizational Strategy |
Description & Purpose |
|
Consistency in Item Placement |
Routinely placing items in the same location builds memory, enabling quick and reliable access during emergencies. |
|
Grouping by Priority and Function |
Items are arranged by importance and use (e.g., medical supplies near the top for quick access, fishing gear deeper as lower priority). |
|
Use of Water-Resistant Bags |
Separates and protects items from moisture, keeps gear dry, and aids quick identification of contents. |
|
Durability Considerations |
Protects contents from damage due to drops or impacts by using durable containers and padding fragile items. |
|
Categorization by Basic Survival Needs |
Organizing items into categories like shelter, fire, water, food, and tools helps logical grouping and retrieval. |
|
Dual Kit System (Emergency & Training Kits) |
Having two identically packed kits ensures consistent organization and familiarity, reducing errors in emergencies. |
You don’t have to keep your survival kit in one spot. Some people spread supplies around their home or car for better preparedness. Checklists can help you track what’s in your kit and make sure nothing gets missed.
Accessibility Tips
Quick access can make all the difference in an emergency. Place high-priority items like first aid, water, and fire-starting tools near the top or in outside pockets. Use clear bags or labels so you can spot things fast. Studies show that task-based layouts—where you group all items needed for a specific job together—help you work faster and make fewer mistakes. For example:
- Task-based organization improves efficiency and reduces errors.
- Familiar layouts help you remember where things are.
- Cognitive aids, like checklists, further cut down on mistakes.
- Some layouts may add weight, but the benefits often outweigh this.
If you use a pocket survival kit, keep it in a spot you can reach quickly, like a jacket pocket or the top of your backpack.
Weight and Compactness
A heavy kit slows you down. Focus on packing only what you need. Choose compact, lightweight versions of each item. Multi-use tools save space and weight. For example, a tarp can serve as both shelter and a rain catch. Your pocket survival kit should hold only the most critical items, like a small knife, water purification tablets, and a fire starter. Test your kit by carrying it on a short hike. If it feels too heavy, remove extras. Remember, a well-organized survival kit is easier to carry and more useful when you need it most.
Survival Kit Maintenance
Regular Checks
You want your survival kit ready when you need it most. Regular checks help you keep everything in top shape. Experts recommend setting a schedule for these inspections. You can use a time-based approach, like checking your kit every month, or after any big trip or emergency. Some people prefer to check their kit after a certain number of uses. Both methods work, but the key is consistency.
- Time-Based Maintenance: Inspect your kit every 30 days or at the start of each season.
- Usage-Based Maintenance: Check your kit after each use or outdoor adventure.
- Condition-Based Maintenance: Look for signs of wear, damage, or missing items.
▶Tip: People who believe in being prepared tend to keep their survival kits stocked and ready. Regular inspections make a real difference in your survival readiness.
Replacements and Updates
Items in your kit don’t last forever. Food bars, water pouches, batteries, and first aid supplies all have expiration dates. Most experts suggest replacing these items every 3 to 5 years. Medicines and light sticks also lose effectiveness over time. Packaging can break down, and batteries can leak. Make a habit of checking expiration dates and swapping out old supplies.
|
Item Type |
Recommended Replacement Interval |
|
Food & Water |
Every 3–5 years |
|
Batteries |
Every 3–5 years |
|
First Aid Items |
Every 3–5 years |
|
Medicines |
Every 3–5 years |
Keep a simple log or checklist to track what you replace and when. This helps you avoid surprises during an emergency.
Personalization
No two survival kits should look the same. Your needs, location, and risks are unique. Think about your family, pets, and any special medical needs. If you live in a cold area, add extra blankets or hand warmers. In a hot climate, pack more water and sun protection. Update your kit as your life changes—new family members, pets, or health conditions all matter.
▶Remember: A personalized survival kit gives you the best chance in any survival situation. Review and adjust your kit regularly to match your current needs.
You can start building your survival kit today. Regular checks keep your supplies fresh and ready. Try these steps for long-term success:
- Replace food, water, medicines, and batteries every six months.
- Review your emergency plan and update contacts once a year
- Inspect and swap out bleach, fuels, and batteries as needed.
- Store your kit in a cool, dry spot.
- Restock anything you use right away.
Personalize your kit for your family and local risks. Stay prepared—your future self will thank you!
Compartir:
Top 10 Must-Have Survival Gear Items for Any Emergency Situation
Why Every Home Needs a Survival Gear Kit (Even If You’re Not a Prepper)